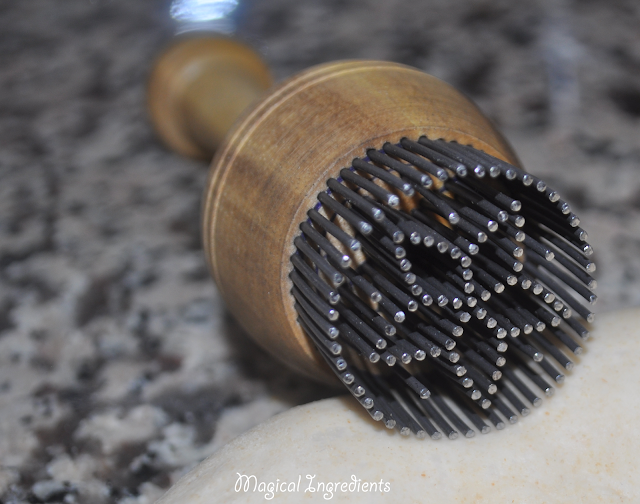
Uzbek non or obi non is a flat bread from Uzbekistan. Though the Naan type flatbreads are common all over central Asia, this one was exciting. Because of the stamp. I have never used these stamps. When I saw about these in the Facebook discussions, I ordered one from amazon.
There many designs in these stamps. They are called 'chekich' and have intricate designs. It is a great work of art and using them in bread is quite brilliant. Loved the intricate designs even after baking. It was fun and exciting to use the stamp and see how it worked. Kids had fun in stamping the bread. The center of the Non was flat after baking and the sides are puffed up. I liked the shaping technique too.

I was checking some videos and liked
NastassjaCanCook. Her method was easy. I tried to make it whole wheat and was trying with different combinations. I liked the version I had shared today and used regular whole wheat atta (whole wheat flour) that I use to make everyday chapathi and roti. This flour absorbs more water. So I have changed the liquid measurements accordingly. Initially while kneading, it may be a little wet, but keep kneading to form a smooth and soft dough. I used my bread machine for this part after the first trial and hence this part was breezy. Different brands may need different water for kneading and hence adjust according to your wheat flour. Her tip to shape the bread was very helpful. Also, my dough doubled in 1 hour though she kept for 2 hours. If you live in cold regions, adjust the proving time accordingly.
This month the Bread Baking Babes are baking Uzbek flatbread. It is the13th anniversary, and our host is Tanna of My Kitchen in Half Cups picked this bread for this event. I joined the group recently and this is my first post in this group. I couldn't resist the stamps and hence started my trials of making this yummy bread. Tanna has given a great step by step guidance to try this in everyday yeast version as well as a sourdough version. I tried the wild yeast method and still need to improve on the sourdough version. We love sourdough bread and hence pretty soon would be making this version again.
They are great with stews and curries. I loved them especially with Dal Makhni (Dal cooked in butter and spices). They are good with soups too. I read about the tradition that it is torn and served and not cut into pieces. They taste great with chai too! Chai, non and fruits can be a great breakfast.This recipe makes 20-22 in nons, but can be made into 4 smaller ones too.
Ingredients
Makes 2
Bread flour - 2 cups
Whole wheat flour -1 cup
Sugar - 1 tsp
Salt - 1and 1/4 tsp
Butter - 3 tbsp (melted)
Active dry yeast - 1 and 1/4 tsp
Milk - 3/4 cup
Water - 3/4 cup
Heavy cream - 1 tbsp, for brushing
sesame seeds( for decoration)
Method
Add everything except melted butter, heavy cream, and sesame seed to the bread maker and set it in dough cycle. When it is kneading for the final longest duration add the melted butter and let it continue. After an hour, the dough will be doubled in size.
After it has doubled size, punch and roll the dough. Divide the dough into 2 halves. Roll each dough onto a ball. Leave it covered for another 30 minutes to prove again. Preheat the oven to 420 degrees F. Keep a tray in the bottom of the oven.
Gently flatten the dough a bit. Then gently push in the middle and slowly work towards the edges pushing the dough to the edge thereby creating a flat surface in the middle and creating a border around the edge to a circle of 20-22 inches diameter. Transfer to a baking stone or pizza pan. Punch using the stamps in the middle. Brush with heavy cream and sprinkle sesame seeds. Add water to the tray in the bottom to create steam. Put the non in the oven to bake. Bake for 22-23 minutes.
Cool and serve with tea, soup, or as such.


Absolutely beautiful! I love your idea of chai and non with fruit for breakfast. ♥
ReplyDeleteYour non are gorgeous, Radha! The colour is really wonderful. Clever you to get the stamp pattern to show up once the bread is baked. Many thanks for baking with us!
ReplyDeleteAlso, thank you for pointing to the YouTube video! (Now I have to learn more about patir....)